

“A Wikipedia article is a process, not a product.” – Clay Shirky, writer and social media theorist
Welcome back to our Wikipedia Master Class series. In the first installment, we covered the question of how to know whether your brand is ready for a Wikipedia article, and the first steps you need to take to make it a reality. Now, we’re ready to move into the nuts ‘n bolts how-to of article creation and editing. Are you ready?
Trust the Process
Brilliant social media theorist and TED speaker Clay Shirky notes that Wikipedia is about the process, not just the end result. However, for the final product to be truly beneficial, those helping produce it must care passionately and respect the process behind it. And as Clay correctly states, without those two critical elements, the whole thing falls apart and “…it would be gone by next Thursday.”
So, what does the Wikipedia process look like anyway? Well, it looks a lot like this:

As this diagram shows, it’s a pretty straightforward process beginning with your user account and Conflict of Interest (COI) declaration, and ending with your article’s publication. But, there’s one more very important piece to the puzzle that you need to know about: patience.
The wheels of Wikipedia don’t always turn quickly, so you’ll need to accept that there may be a whole lot of hurry-up-and-wait in the journey to your final article. After submitting your request for a new article or edits to an existing one, you need to be patient and wait to see if you receive a response from your fellow Wikipedia editors.
I know that’s like telling a kid on Christmas morning that you have to wait for an hour to open presents, but respecting the process is key to earning the respect and trust of the editing community. That doesn’t mean that you have to be idle, though. The down period while waiting for an answer is the perfect time to start or continue researching your third-party citations.
After you’ve waited for a response to your article or edit request (I recommend giving it at least a week and a half to two weeks or so) you can begin crafting your article. When it comes to structuring, writing, and editing, Wikipedia’s Manual of Style is your new best friend. Everything you need to know – from headings and sections, to punctuation, to rich media – is in there. Get to know it, learn it, live it, love it.
Once your article is complete, it needs to be submitted for review by the Wikipedia editing community…and then you get to wait some more (remember what I said about being patient?!) until one of two things happen. You’ll either receive the go-ahead to move your article to the live Wikipedia server, or you’ll receive suggested edits and revisions that must be made before publishing. If you get the latter rather than the former, you’ll need to edit and repeat the submission process until your article gets the community’s blessing.
Talk and Editor and History Pages, Oh My!
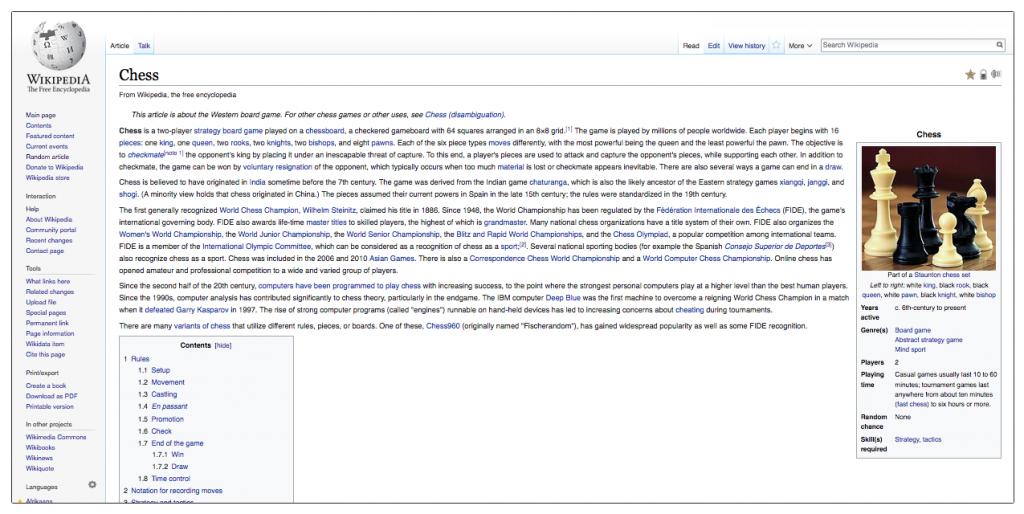
Now that you have a glimpse of what the process is like, let’s talk about where the magic actually takes place. Every Wikipedia article has four pages associated with its creation: Article, Talk, Editor, and History. The Article is your finished product:
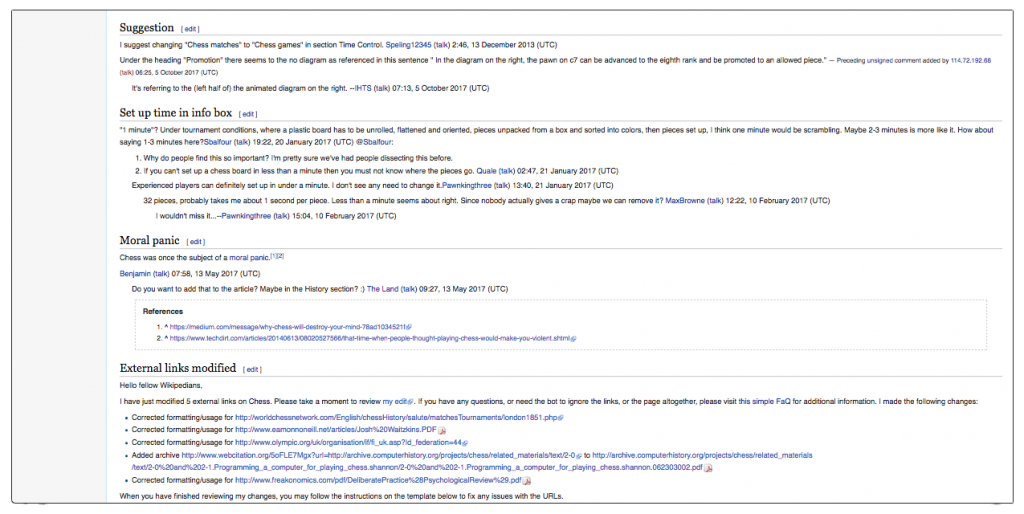
The Talk page is a space for editors to discuss article improvements and corrections:
The Editor is where you’ll generate the underlying code that actually displays your article:

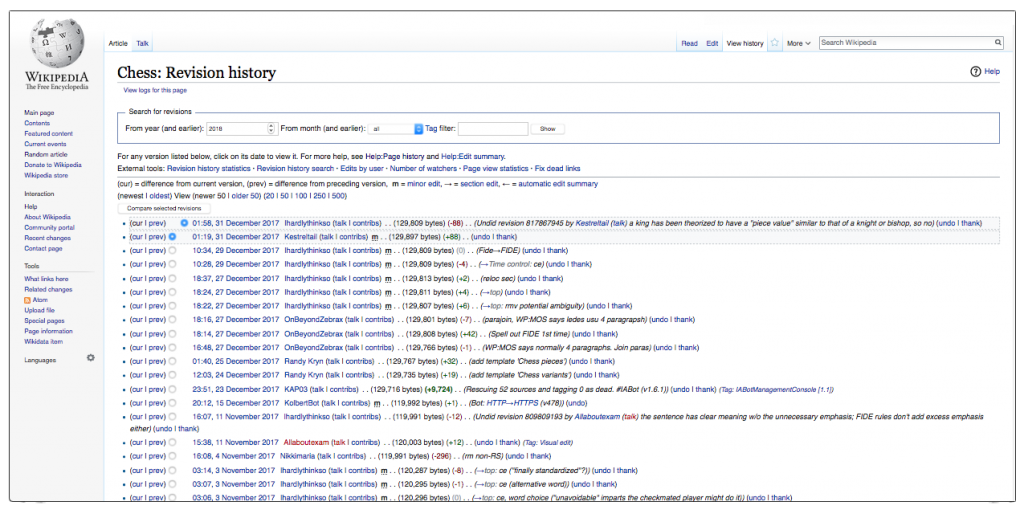
And last but not least, the History page shows a chronological list of edits to the article:
Now, three of these four pages might look intimidating, especially to new Wikipedia editors. But like with anything else, once you get used to them, you’ll see they’re a whole lot friendlier than they appear at first glance.
The Talk page is intended as a safe space for collaboration and debate about improvements and corrections to the article associated with it. It’s not supposed to be a forum for arguments over the article’s topic, however, with the human species’ love of squabbling with one another, it’s not surprising to see heated back-and-forth exchanges break out on Talk pages. While you may want to pay attention to the sentiment being expressed (yay, social listening!), it’s generally okay to disregard these tempest in a teapot spats.
Let’s talk about that screenshot of the Editor I shared up above. If you’re not familiar with HTML or wiki markup languages, that strange-looking, gobbledygook code is enough to send a non-programmers screaming from the room in fright. For those of us who’ve been doing this for awhile, learning to code in Wikitext was a necessity. In 2013, Wikipedia finally took pity on everyone and released a full-function, visual WYSIWYG editor that makes crafting your article almost as easy as writing a Word document. Pretty nice of ‘em, no?
And that brings us to the History page, which is just like it sounds – it’s a living record of every edit that was ever made to a given article. And if people are signing their work like they’re supposed to when editing, this page will tell you not just when an edit was made, but by whom. It’s a handy way of tracking those editors that are actively working on an article. As I mentioned in Part I of this series, transparency is the name of the game, so always, always, always sign your work.
Sometimes, edits can be very subtle – just the addition of a comma here, the correction of a typo there. If an article has been edited but you can’t easily discern what was done, the History page has a nifty tool that makes comparing different versions a snap. From there, you should be able to quickly identify what changes were made.
Now that you’ve been introduced to the editing process and the pages associated with it, you’re all ready for the next installment in our series. We’ll be talking about Wikipedia’s golden rules, and sure-fire ways to get yourself banned from editing. See you then!